
Billing Automation allows you to automatically collect customers’ payments every month on your Whitelabel. Subscriptions and recurring payments are handled by Stripe. We integrated with Stripe to manage customer payments.
You can implement many pricing models like charging a fixed price every month, charging per number of contacts, charging per number of admins, or charging per number of connected channels. You can also mix pricing models, for example, you can opt to charge your customer a fixed price and also charge per a number of admins added to an account.
Requirements
Currently, it is required to have a Stripe account in order to use billing automation. Stripe is clearly the best service to automate billing for SaaS companies. Be aware that only you need to have a Stripe account. Your clients only need to have a credit card to pay for your services.
Setup Stripe integration for Billing automation
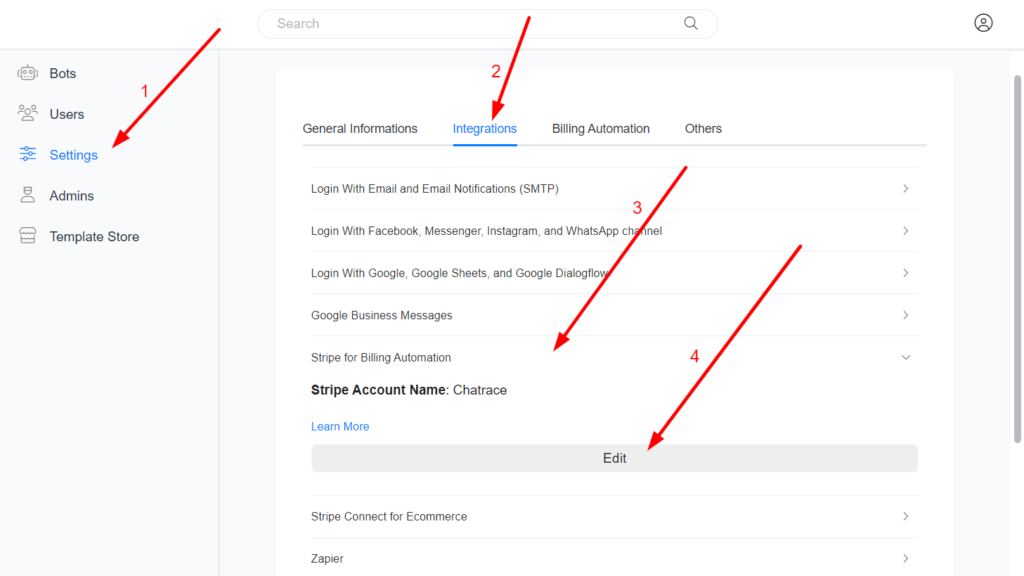
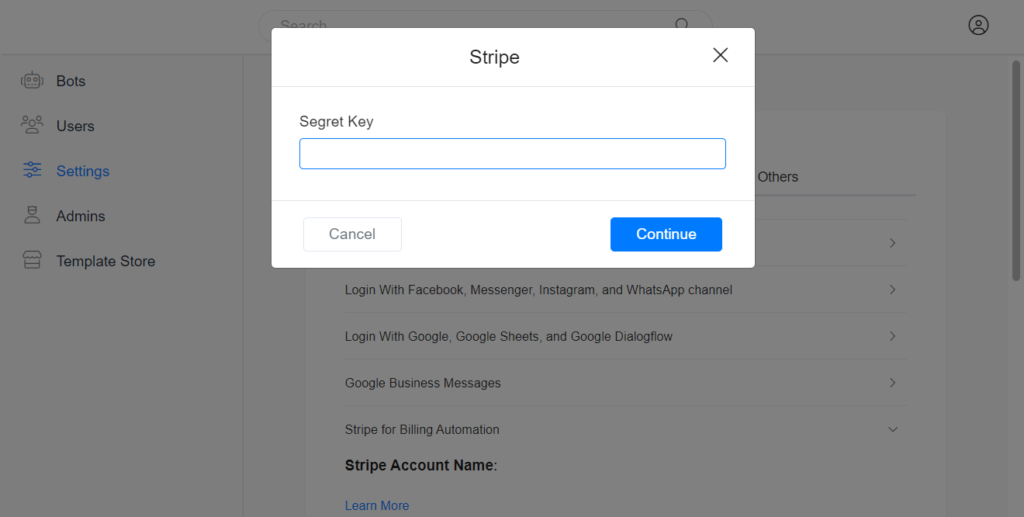
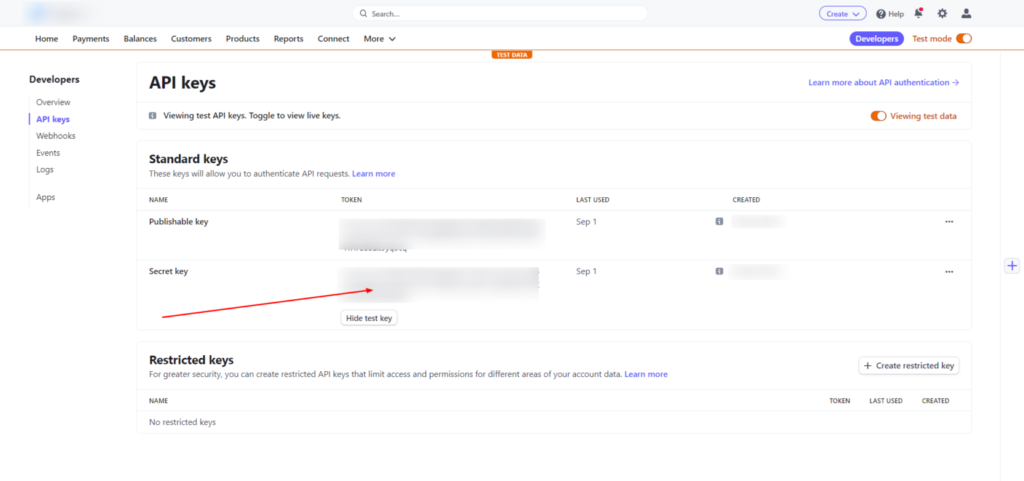
Secret Key: Go to Developers > API keys to find your account secret key.
Create your pricing plan on Stripe
Go to Products on Stripe and click the “Add Product” button.

Name of the Product: It can be any name. For example, PRO.
Image: No need.
Billing period: Dailly, Weekly, Monthly, Every 3 months, Every 6 months, and Yearly.
Pricing model:
Standard pricing: Choose this model if you want to charge your customer a fixed cost every month. Also, you can choose this model if, no matter the number of contacts, admins, or channels, the cost for a single unit is the same. For example, if you want to charge 20 USD per admin, if an account has 1 admin, the cost is 20 USD, if the account has 10 admins, the cost is 200 USD.
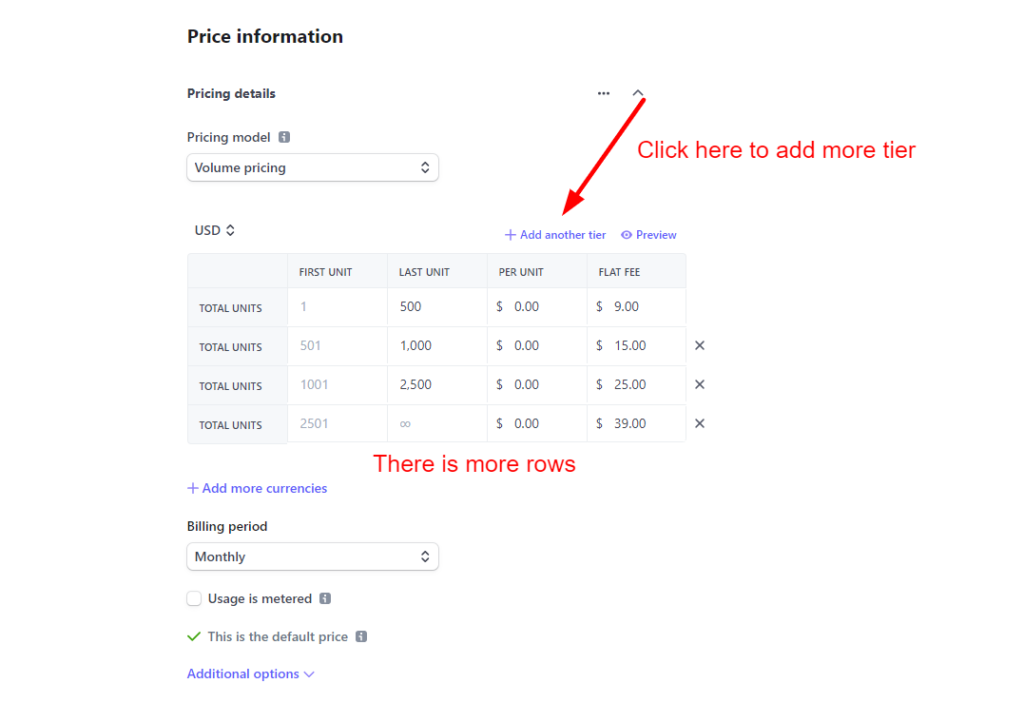
Volume pricing: Choose this model if you want to bill your customer based on their usage at the end of the subscription cycle.
You can opt to charge your customer a flat fee of 100 USD if they have 0 to 500 contacts, 300 USD if the account has 500 to 5000 contacts, and 400 USD if the account has more than 5000. Also, you may want to charge your clients 0 USD if they have up to 3 admins and 50 USD per admin if they have more than 3 admins in their account.
The image below shows how we set up the tiers for the Chatrace Pricing. Try to always use the Price per unit as a 0. The quantity could be the total number of contacts, admins, or channels.
The example below shows how we created the pricing for Chatrace.
Imagine you want to charge an account 50 USD per admin if they have up to 5 admins, 40 USD if they have up to 10 Admins, and 35 USD per admin if they have more than 10 Admins. The same logic could be applied to charging based on the number of channels.

Creating your pricing plan on Whitelabel
After you have created your plan on Stripe, go to your Whitelabel Admin Dashboard > Settings > Billing Automation > Plans and click the Add button.
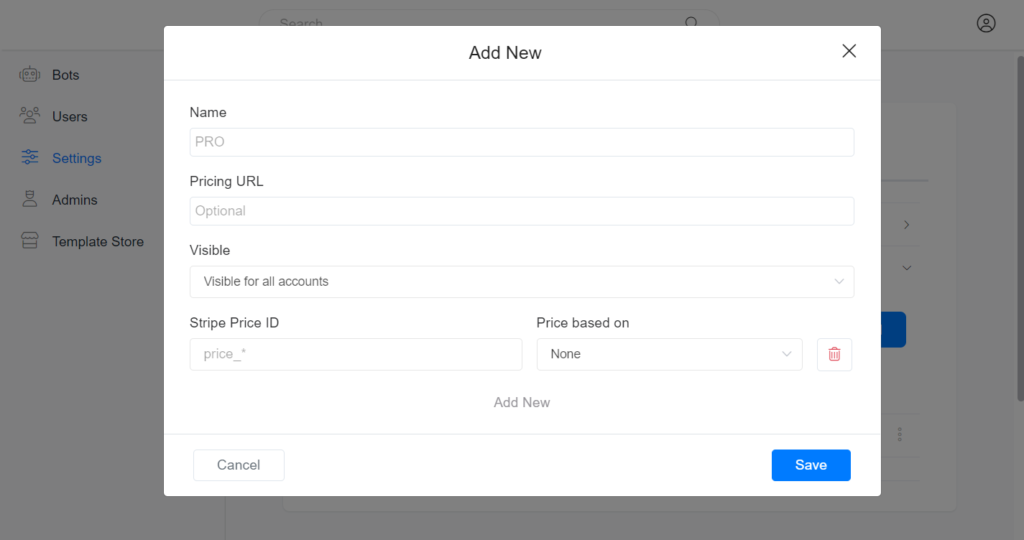
Name – the name of your plan. Your customers will see the name of your plan when they subscribe to your plan.
Pricing URL – if you have a webpage where you provide more information about your pricing, this field allows your clients to easily get more information about your pricing.
Visibility: If this plan is visible to all accounts or not. When a plan is visible to all accounts, the plan is visible on the list of plans that your customers can subscribe to. Otherwise, only accounts that you grant access to this plan will see the plan when they are upgrading to PRO.
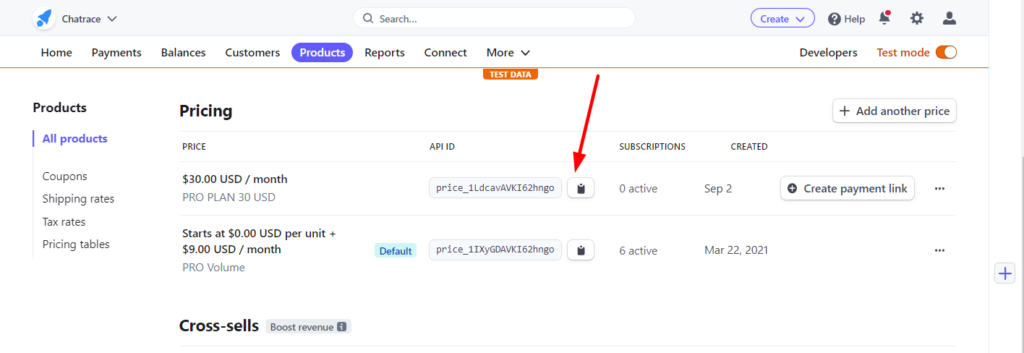
Stripe Price API ID: go to Products and get the API ID.
Price based on
None: The customer will be charged a fixed amount regardless of the number of contacts, admins, or channels …
Contacts: The customer will be charged based on the number of contacts. We advise you to use this on the Volume Pricing modal. Please be aware that the number of contacts includes all contacts available on the account, it is not only the active contacts or contacts added during the billing cycle. For example, if in January an account had 600 contacts and in February the account added +400 contacts, the total number of contacts in February is 1000.
Admins: The customer will be charged based on the number of current admins on the account.
Channels: The customer is charged based on the number of channels connected to his account.
If you want to charge an account based on more than 1 metric, click the “Add New” button below the Price ID input field.
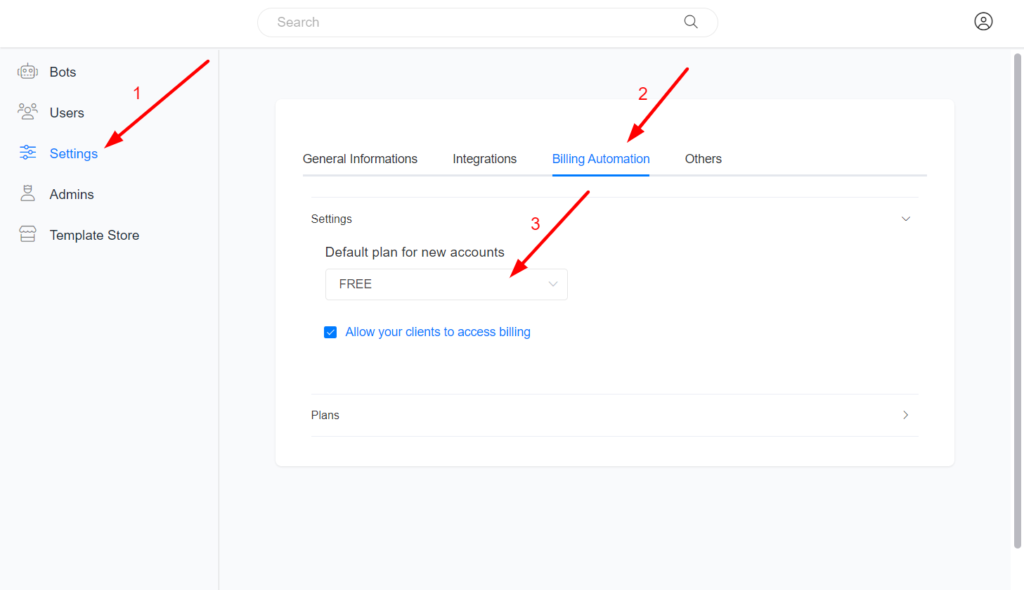
Setting the default plan on your Whitelabel.
The default plan on your Whitelabel is PRO. If the default plan is PRO, the account can access all features, and the billing session is disabled. To allow your clients to subscribe to your plan, set any plan other than PRO as the default plan on your Whitelabel.
There are 4 plans available on the Whitelabel.
1 – FREE: the free plan doesn’t allow your clients to access PRO features. Your clients will see the UPGRADE button.
2 – PRO No Subscription: the PRO plan allows your clients to access all features without paying. Your clients will not see the UPGRADE button.
3 – PRO Trial – Downgrade to FREE at the end: the account can access all features for a certain number of days. Your clients will see the UPGRADE button. If the account doesn’t subscribe to PRO during the TRIAL period, the account will automatically downgrade to FREE.
4- PRO Trial – Force to pay at the end: the account can access all features for a certain number of days. Your clients will see the UPGRADE button. If the account doesn’t subscribe to PRO during the TRIAL period, the account will stop working, and the customer will be forced to subscribe to your PRO plan.
You can change the default Plan on your Whitelabel by following the image below.
Allow your clients to access billing.
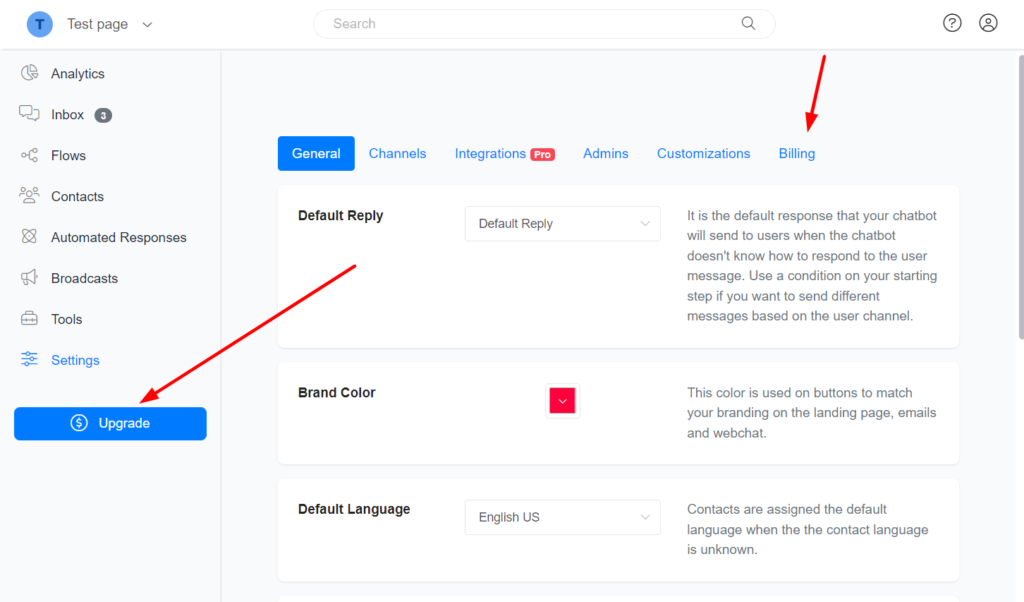
You can allow your clients to access the billing session of their accounts in order for them to subscribe to your plan. If you enable the option “Allow clients to access billing” and an account plan isn’t PRO, your clients will see the UPGRADE button inside their accounts.
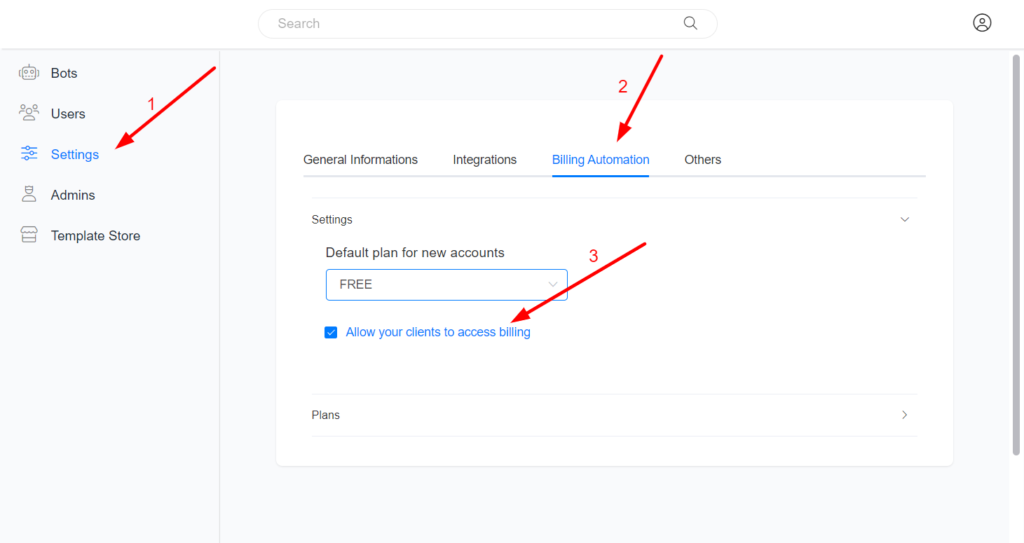
The UPGRADE button and the BILLING tab in settings are visible after you allow your clients to access billing on your Whitelabel.
Billing settings at the account level
Sometimes you may want to have custom pricing for a specific business, or you may want to offer specific account access to the PRO feature without payment. In this situation, you have to make changes at the account level.
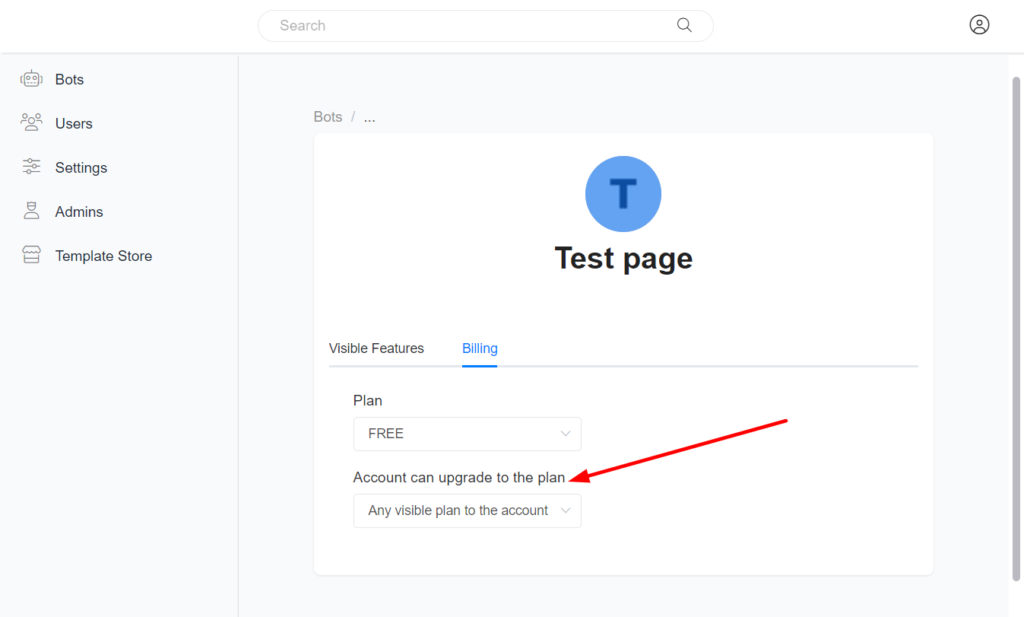
If you want to have a specific plan available only for a specific account, create a new plan and make the plan invisible. After creating the plan, you need to associate the new plan to the account in Account Billing. To find an account billing, go to Whitelabel Admin Dashboard > Bots, find the bot, and click Edit. You will see the billing page like the below image.
Limitations
Currently, you can’t automatically set what features are available based on a plan. There are features that are available only for the PRO plan. An account in the FREE plan can’t access features only the PRO plan can access. But you can already manually disable a feature per account.