It is now possible to create a dynamic gallery from any Google Sheet you have created. It opens up a ton of options where you are able to have the full power of Google Sheets available
So how do we start using it?
Connect your Google Sheets account
Before anything else be sure to connect Google Sheets with chatrace if you did not do so already. If you need help with setting that up you can do so here
Creating the Dynamic Gallery
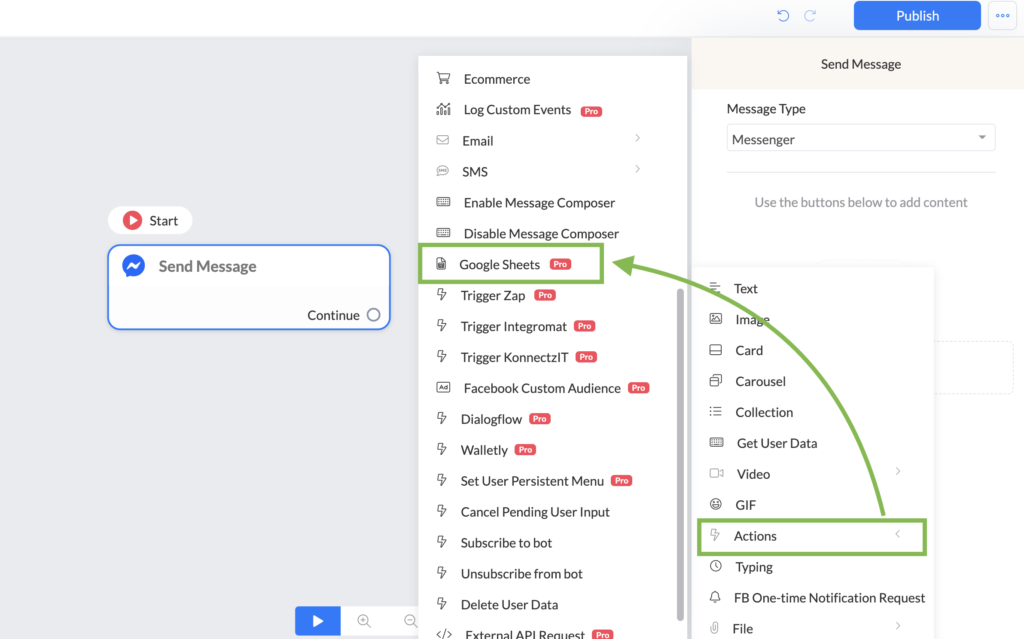
In order to do so go to your flow builder and use the action Google sheets -> Generate Dynamic Gallery from any Google Sheet.
From here you connect your spreadsheet and the worksheet you want to use. You will then see a gallery card appear and it is from here that you will build your own gallery card.
As you can see it is a really visual way of creating your gallery card.
To populate the image url, Title and subtitle you use the columns that are available in your Google Sheet. If you press the { or the variable icon you will get to see your available columns by name, which makes it really easy to select the correct one.
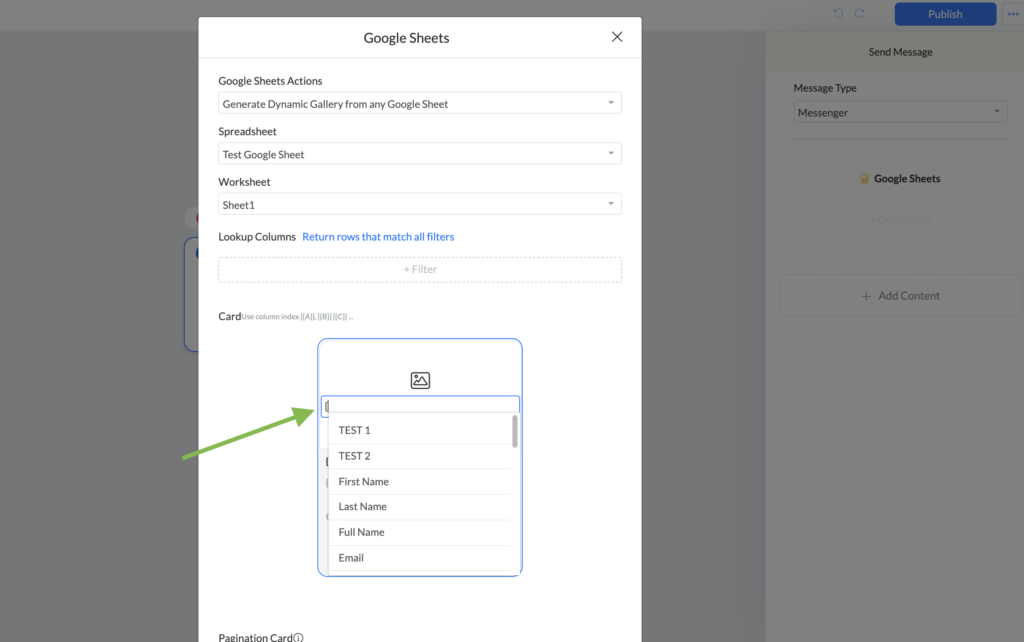
You can select the correct columns very easily. Do make sure that when selecting the column for the image that you have inserted a correct URL inside that column. Otherwise, you might get an error when trying to view the gallery card. You will also have access to all the other variables if you want more customization or personalization.
Once you’ve selected your desired columns you can also add a button if you wish. When pressing the button you will have a few options to choose from just like when you create a normal button.
Those options are:
- Open website
- Call number
- Start step
- Start external step
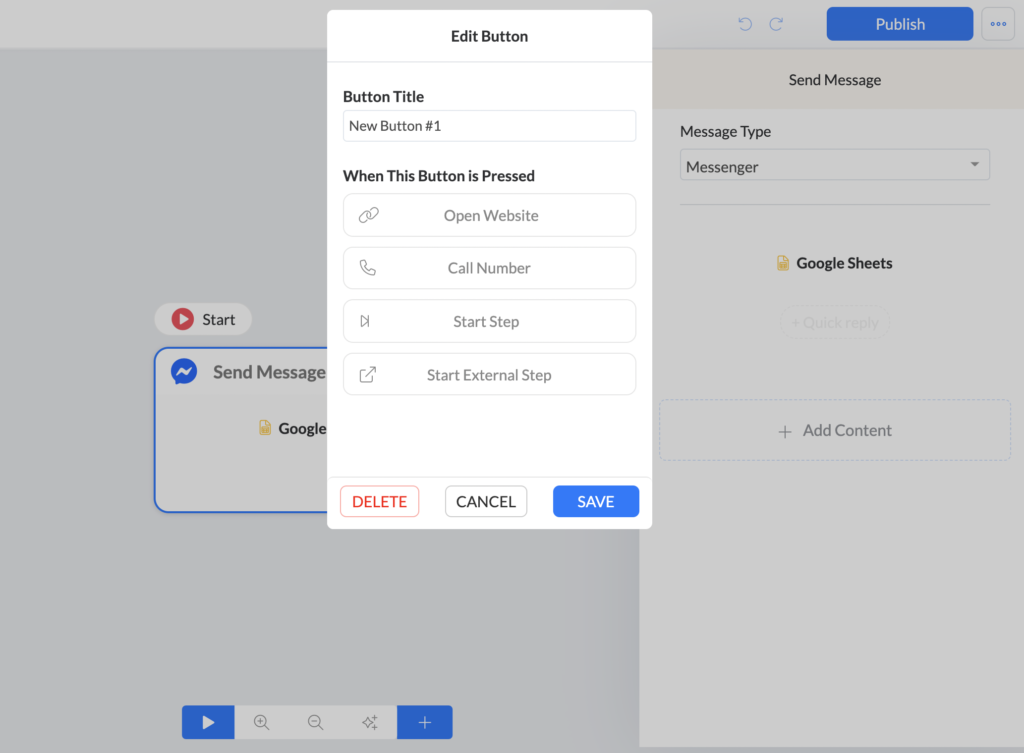
When you choose an option then you will also be able to perform additional actions. There are no restrictions to the amount of actions you can set up. But there is one limitation and that is set by Facebook unfortunately. But we will get in to that more later.
How to provide dynamic information based on chosen option
So far we have learned how to set up a dynamic gallery card. Now it is time to work on how to provide the following information and use additional actions to truly understand how easy but incredibly powerful this new integration is.
Let’s take a look at a sample sheet

We have two items here that display a Plain Frappuccino and Caramel Frappuccino. Depending on the choice the subscriber takes we want to show the detailed description matching that choice.
To set this up we need to press the more info button we set up on the gallery card in the Google sheet action. When pressed we can choose an additional action that is called the Set Custom field.
From here a pop-up window will appear and we will be able to set the custom field of our choice with a value.
We will choose Column D (inserted as {{C}} as that provides the details we would like to display.
The result of the set up until now will look like this;
Once done press the button save to complete the action. Then press save once again to exit the Gallery card set up.
So let’s see how this looks like in the backend so far
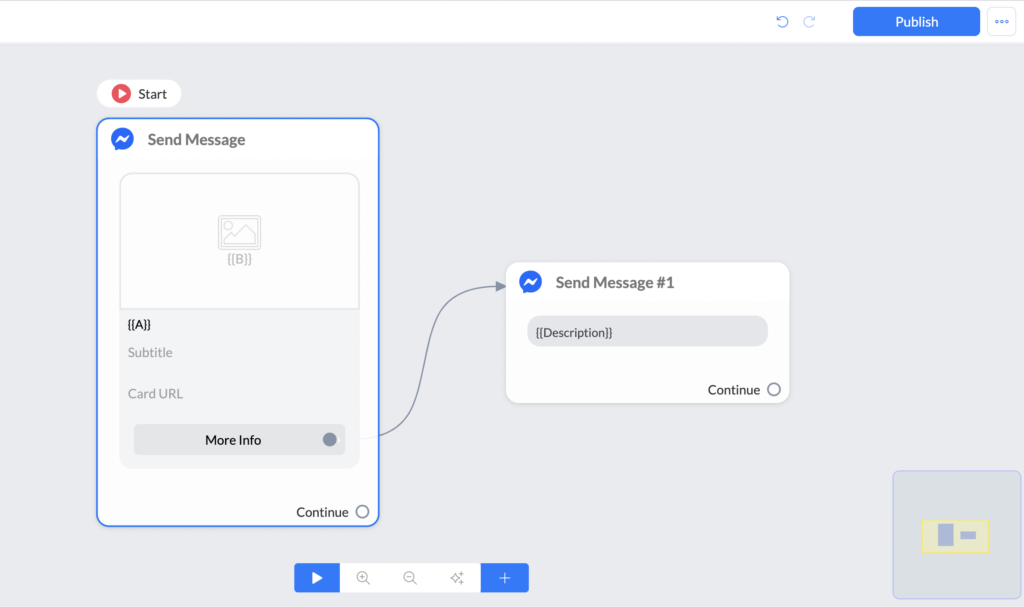
It looks really basic right?
See how easy it is to show information that is stored in any column inside your Google Sheet?
Just use the action set custom field and set the value to the column that will contain the information.
If you wanted to show multiple columns you can do so by just adding them after the first one.
So this would look like: {{A}} {{B}}
Additional actions examples
To show you how easy it is to use this new integration we are going to provide an example of the additional actions you could use to make it a really powerful combination.
Segmenting your audience
It is very easy to segment your audience based on their last view product or item in the dynamic gallery.
To enable this we will insert another additional action set custom field. Now we will set a custom field called Last_viewed_product to the value of the Product Name in the Google Sheet.
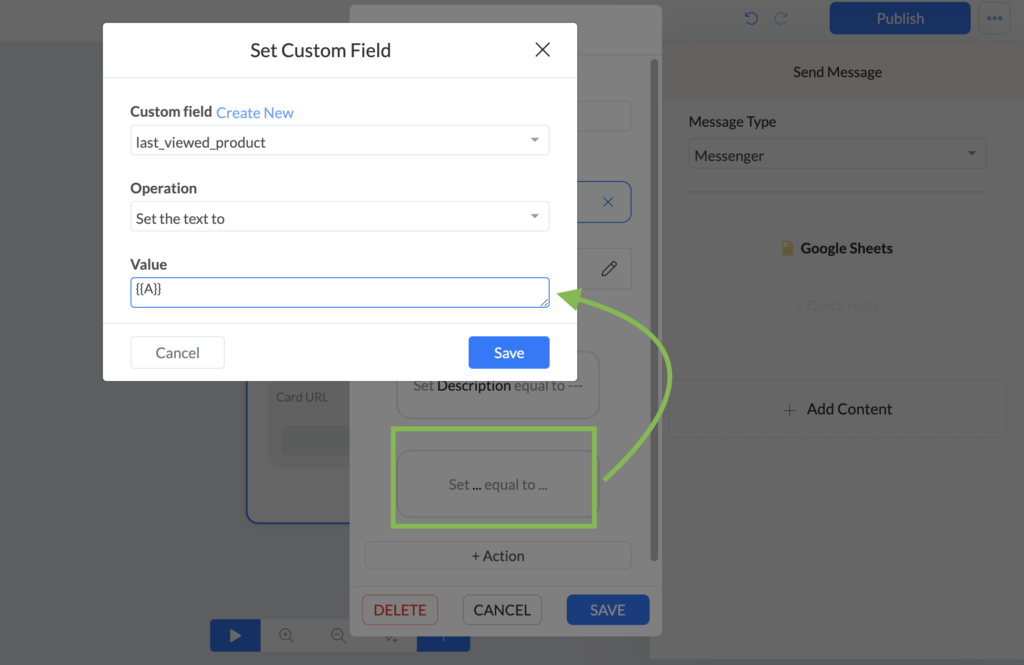
Since the column is the first one the only thing we need to do is use the value {{A}}.
That’s it!
Nothing more to do.
Now when segmenting subscribers it is not advised to use tags at this step, as the tags cannot be set up Dynamically like the action Set custom field can.
But you can still tag that user in the next step if you like. After the button press you could add a condition that checks a users choice by using the last custom field action we set up.
That can look something like this;
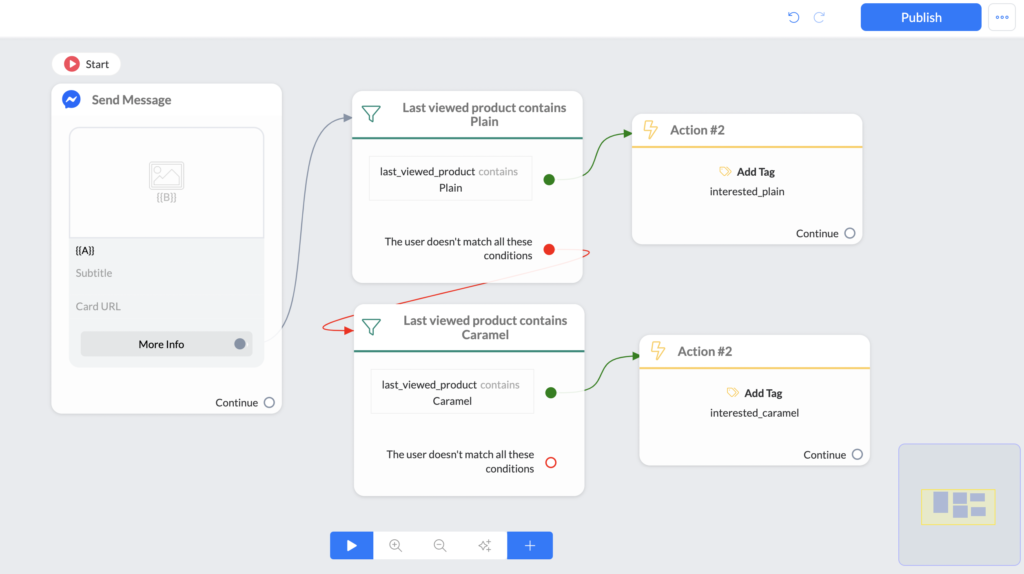
But as you know you can segment by custom fields as well as tags so the above set up may not apply to you.
Segmenting your audience is important though since you can send personalized follow-ups that increase conversions and engagement.
Facebook limitation with additional actions
As mentioned we would also come back on the topic of the limitations.
The current limitation set by Facebook is that whenever you want to set a Custom field the amount of characters can not be larger than 1000 characters. In most cases this will not be an issue, but if you are storing a detailed description from your Google Sheets or combining multiple column values to a custom field you might exceed the amount of characters.
So keep this in mind when setting a custom field with values inside your Google Sheet. But in general you will never exceed this limit. We wanted to point this out to you if you might get an error that this is probably the reason.
