
Overview
This documentation provides a step-by-step guide on how to edit an image using Google Gemini integration within our platform.
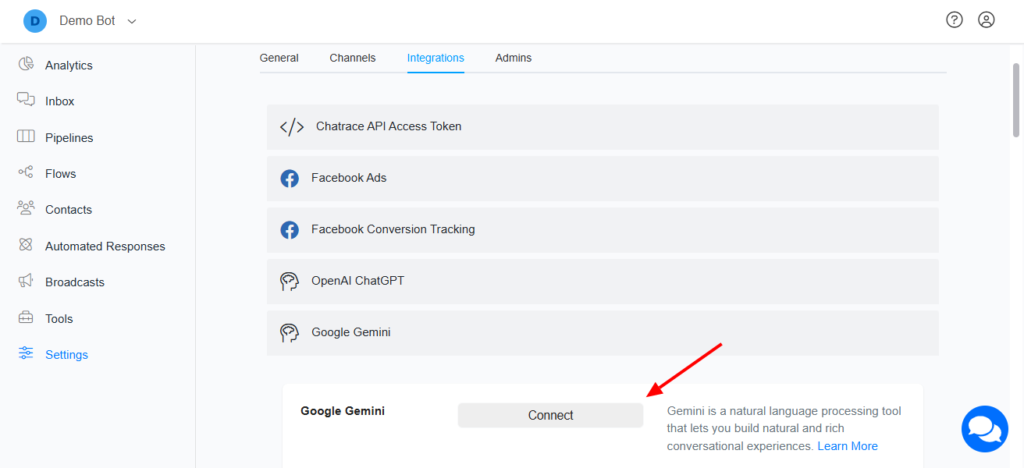
Connect Google Gemini Integration
- Login to your Chatrace account
- Goto Settings >>Integration >> Google Gemini
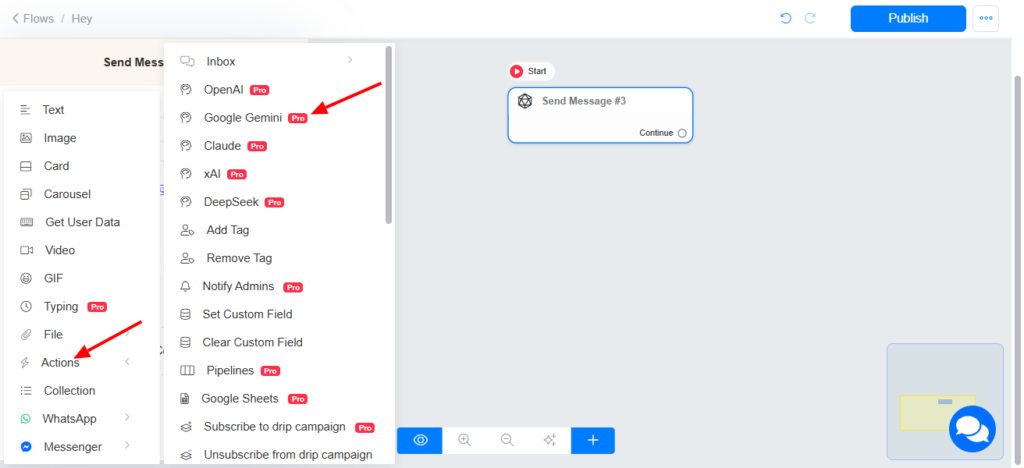
Google Gemini Action in the Flow Builder
Action>> Google Gemini >> Edit image

Select Edit image >> select the image you want to edit >> set the user’s message >> select the custom field to save the output.
- User’s Message: This refers to the instruction/information about what Google Gemini should do to your image
- Image: This refers to the image you want to edit.
- Output Message: This refers to the custom field where the generated image will be saved. This custom field will be used on an image block to display the image to the user.

Success & Failed Nodes
The Google Gemini action includes both success and failure nodes:
- Success Node: This node allows you to define actions that should occur if Google Gemini successfully edited your image (perform action X).
- Failed Node: This node allows you to manage actions if Google Gemini was unable to edit your image (perform action Y)
